Difference between revisions of "Fanvil"
(Created page with "Fanvil Door Box and Intercom Configuration Guide Depending on model, the intercom may have a preconfigured static IP, or acquire a DHCP address. The quick start guide include...") |
|||
| Line 16: | Line 16: | ||
[[File:Relay settings.JPG|File:Relay settings.JPG]] | [[File:Relay settings.JPG|File:Relay settings.JPG]] | ||
| + | |||
| + | |||
| + | |||
| + | The relay pins themselves are circled in red on the board. NC stands for normally closed, NO is normally open, and COM is common. | ||
| + | |||
| + | [[File:Relay pins.jpg|File:Relay pins.jpg]] | ||
| + | |||
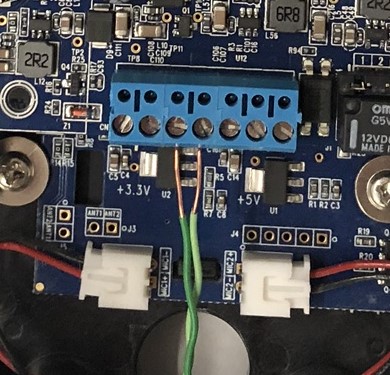
| + | The units have a 6-post terminal bridge that can be wired/screwed down, and then plugged in as a whole to the 6 pins on the board, as follows. This allows for easier wire insertions and screw-downs. | ||
| + | |||
| + | [[File:Terminal bridge.jpg|File:Terminal bridge.jpg]] | ||
| + | |||
| + | |||
| + | |||
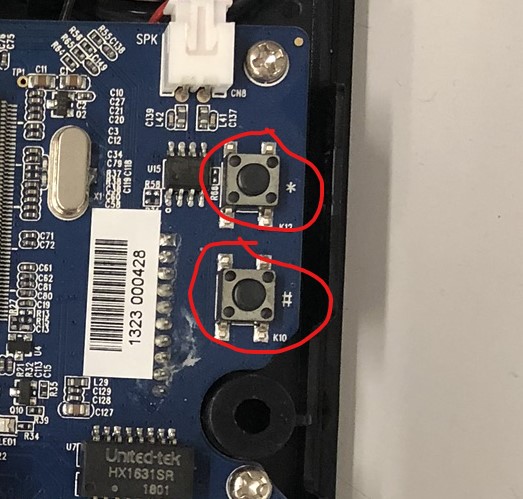
| + | On the board, there are also 2 buttons, labelled * and #, just like on a phone keypad. If the unit has acquired a DHCP address, holding the # button for 3 seconds and then releasing, will casuing the unit to verbally read back its current IP address. | ||
| + | |||
| + | [[File:Onboard buttons.jpg|File:Onboard buttons.jpg]] | ||
Revision as of 19:41, 6 August 2019
Fanvil Door Box and Intercom Configuration Guide
Depending on model, the intercom may have a preconfigured static IP, or acquire a DHCP address. The quick start guide included with the box will contain this information, as it differs per model.
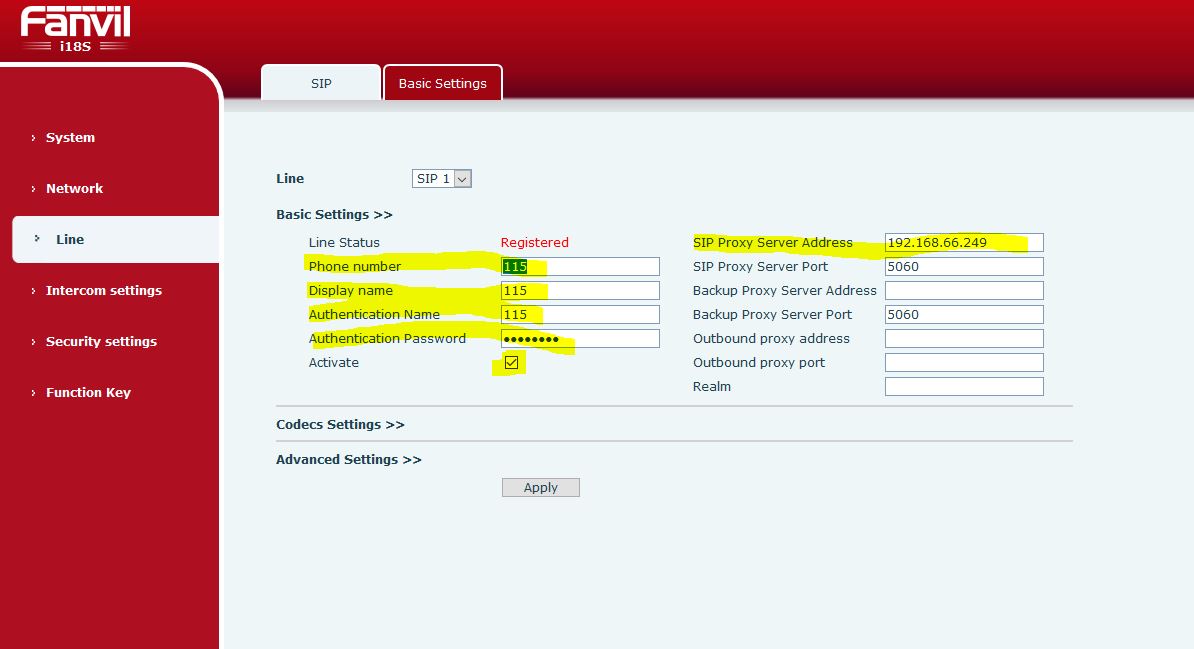
To get basic sip registration, you only need the extension number, SIP password for the extension, and pbx address, in the fields below:
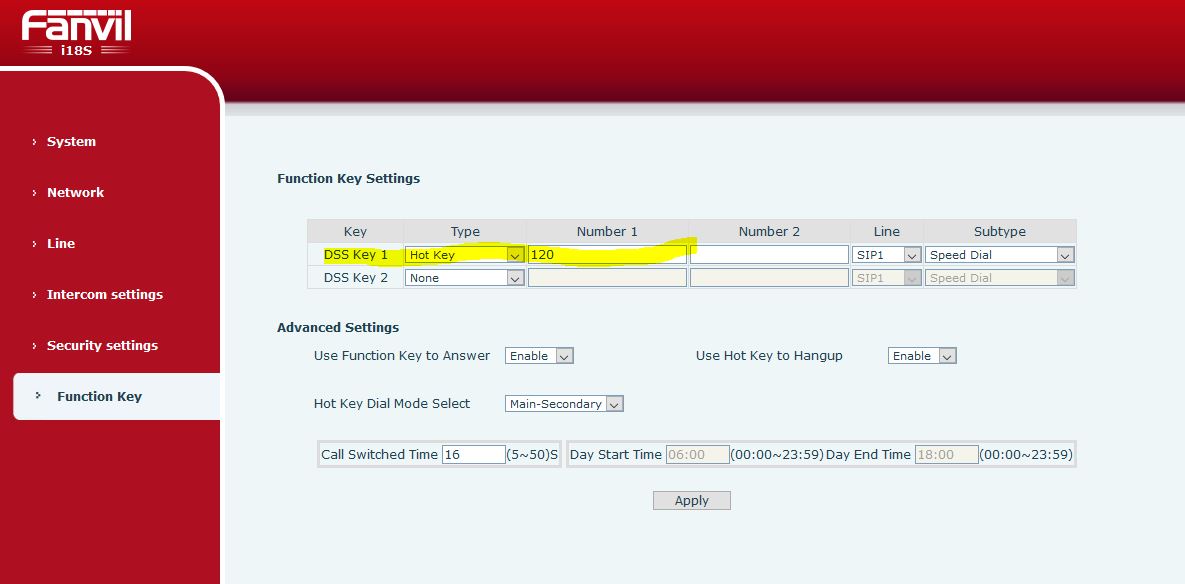
The front intercom button will need to be programmed as a speed dial, as shown, depending on model:
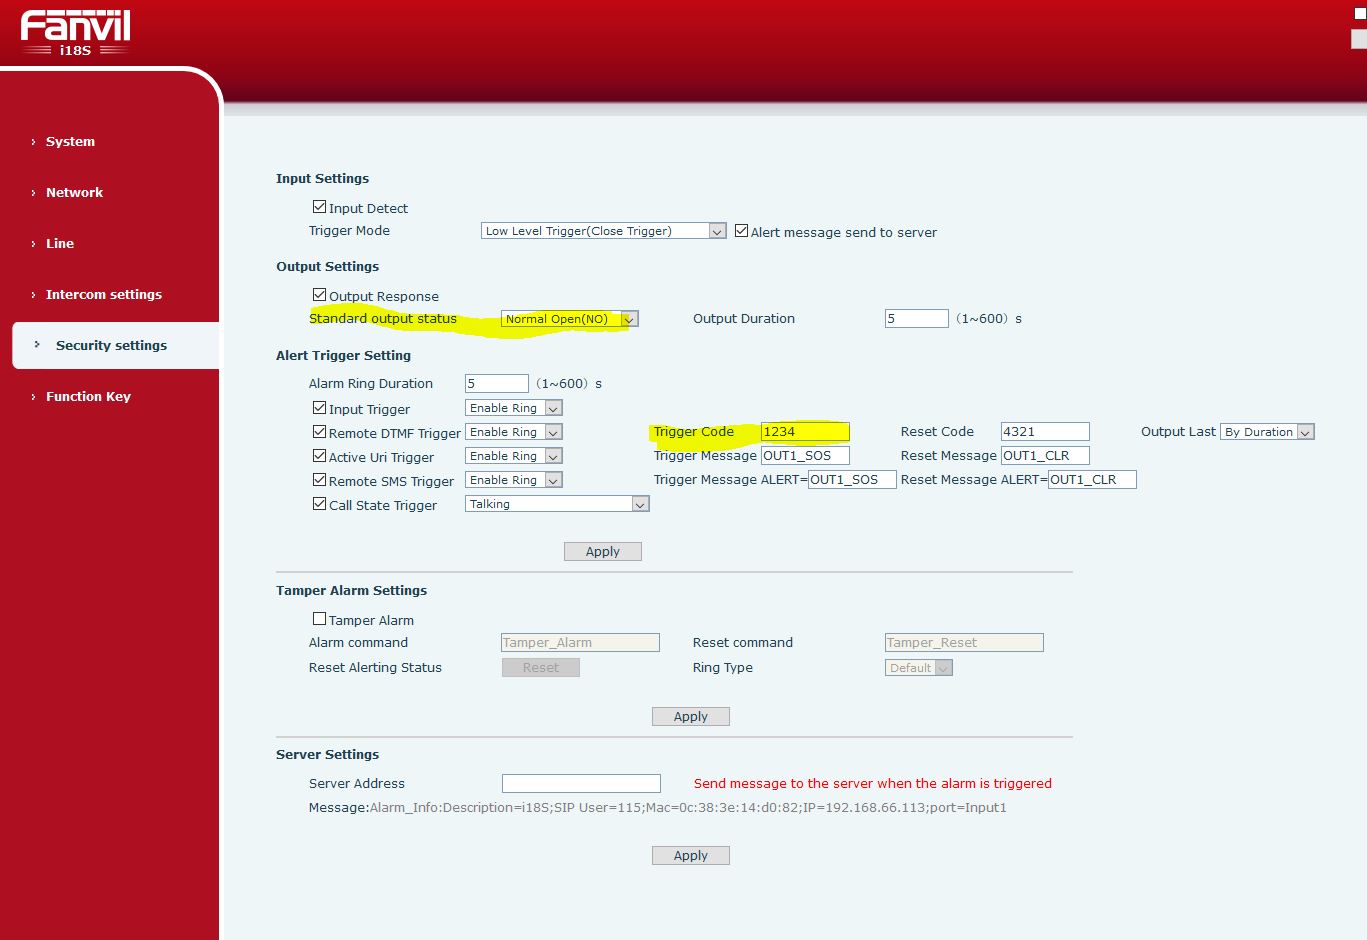
To configure the relay, you'll need to know whether you need Normally Open, or Normally Closed. The setup can be found on this page:
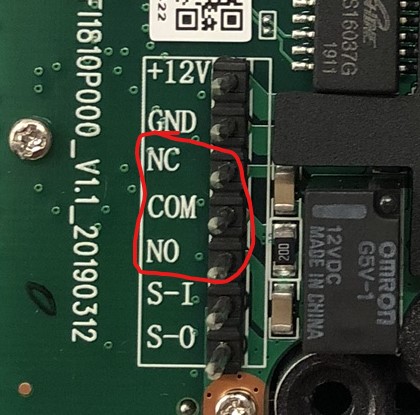
The relay pins themselves are circled in red on the board. NC stands for normally closed, NO is normally open, and COM is common.
The units have a 6-post terminal bridge that can be wired/screwed down, and then plugged in as a whole to the 6 pins on the board, as follows. This allows for easier wire insertions and screw-downs.
On the board, there are also 2 buttons, labelled * and #, just like on a phone keypad. If the unit has acquired a DHCP address, holding the # button for 3 seconds and then releasing, will casuing the unit to verbally read back its current IP address.
