Difference between revisions of "Call Recording"
Jump to navigation
Jump to search
| Line 30: | Line 30: | ||
#Click on the [[File:Savechanges.png]] button. | #Click on the [[File:Savechanges.png]] button. | ||
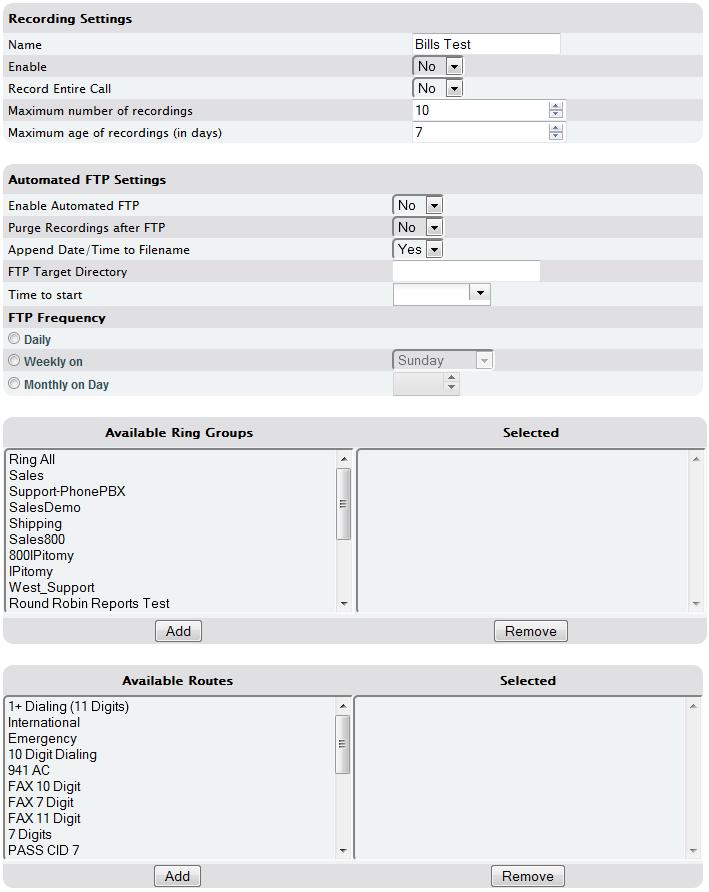
| + | [[File:RecordingJob.jpg|File:RecordingJob.jpg]] | ||
| − | |||
{| class="wikitable" | {| class="wikitable" | ||
Revision as of 17:04, 19 March 2015
This feature allows recording of inbound and outbound calls. Extensions can be put into groups which makes it easier to keep track of calls. There can be jobs that only record inbound calls, outbound calls, or both.
There are currently 3 main mechanisms for recording calls on an IPitomy IPPBX System.
- Manual Recordings:
- Initiated by agent, or Extension User while on call by dialing *# or pressing a programmed key on the phone.
- These recordings are either in Agent Recordings (if they are recordings by an agent taking a queue call). Or they are available in the work folder in the recording extension's mailbox.
- You will need to ensure that the Call Recording is enabled in the proper places for this to work:
- Trunks
- Ring Groups
- Extension initiating the recording
- Extension being recorded
- Initiated by QManager
- These recordings are available through View Recordings in QManager
- Initiated by agent, or Extension User while on call by dialing *# or pressing a programmed key on the phone.
- Third Party Recording
- IPitomy has implemented integration with Trivium to support their call recording application.
- IPitomy Call Recording Application
- Licensed IPitomy Feature that records all calls on designated destinations.
NOTE: When using the IPitomy Call Recording feature, it is advised to configure an FTP to push those recordings to so they can be keep for a long time, and to set the recording job to purge after an FTP push so that the file size does not get too large.
Create New Recording Job
- Navigate to the Call Recording Page under the Applications tab.
- Click Add Recording
- Enter the name of the recording group.
- Add Ring Groups to the recording job that are applicable to the group that you want to be recorded.
- Add Available Routes that you would like to be recorded.
- Click on the
 button.
| Sections/Fields | Description |
|---|---|
| Recording Settings | |
| Name | Enter the name of the Recording Job |
| Enable | Option to enable or disable call recording |
| Maximum number of recordings | Enter the maximum amount of calls you would like to have recorded. If the maximum number has been reached, then the old recordings will be deleted to make room for new ones. |
| Maximum age of recordings | Enter the maximum age of recordings. This will delete recordings after a certain period of time. This will clear out old recordings automatically to make room for new recordings. |
| Available Ring Groups | These are the groups that can be selected to include in the recording job |
| Selected | These are the groups that have been added to be included in the recording job. These are the extensions that you will find recordings for when checking this recording job |
| Available Routes | Routes that can be selected to be included in the recording job. When one of these routes is dialed by any extensions on the system, the call will be recorded. |
| Selected | These are the routes that have been selected to be recorded when dialed by the selected ring groups. |
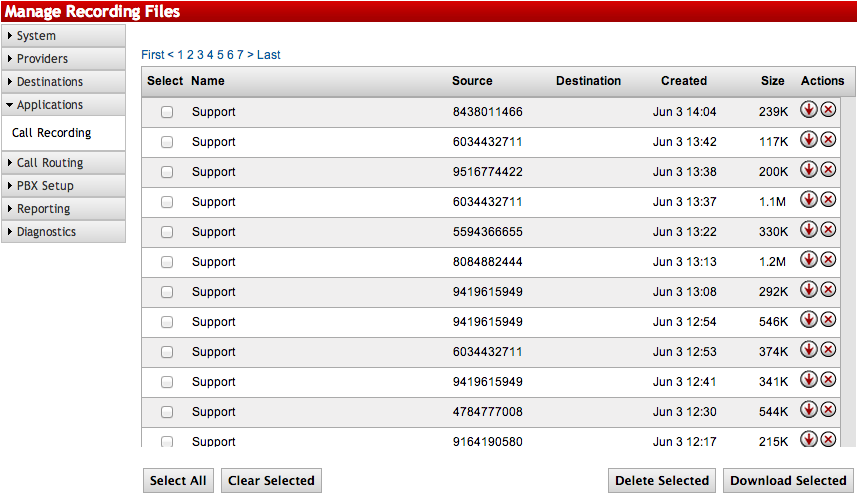
Viewing Recording Jobs
To View the recording jobs and manage or listen to the recorded calls:


