Difference between revisions of "IS710 Door Box"
Jump to navigation
Jump to search
| Line 1: | Line 1: | ||
'''IPitomy Door Box Quick Setup Guide''' | '''IPitomy Door Box Quick Setup Guide''' | ||
| − | + | [[File:IS710v2 Smart Sercurity IP Intercom User Manual.doc|File:IS710v2 Smart Sercurity IP Intercom User Manual.doc]] | |
*The Ipitomy IS710 Door box comes by Default configured to a Static IP of | *The Ipitomy IS710 Door box comes by Default configured to a Static IP of | ||
Revision as of 13:39, 3 May 2017
IPitomy Door Box Quick Setup Guide
File:IS710v2 Smart Sercurity IP Intercom User Manual.doc
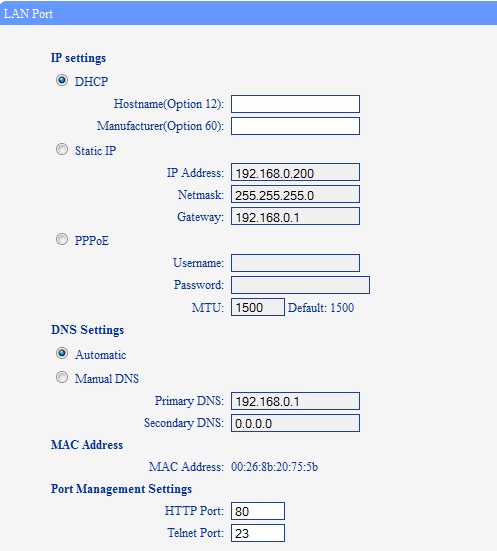
- The Ipitomy IS710 Door box comes by Default configured to a Static IP of
192.168.1.153
- On First login make sure Language is set to English using the drop down on the left.
It is reccomended to connect to this IP address and then step one would be to configure for DHCP the network Settings.
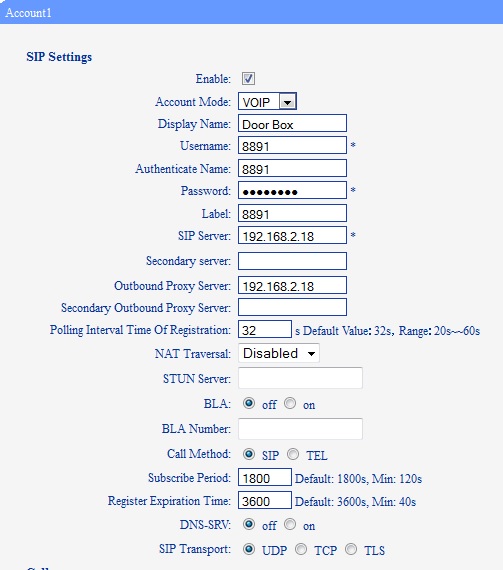
- Step Two Configure Extension
Simply Create an Extension for the Doorbox in the PBX, set the Phone Type to IPitomy 2XX. Then using Auto- Discovery find the device by scanning the network and configure in the normal Auto Discovery Method.
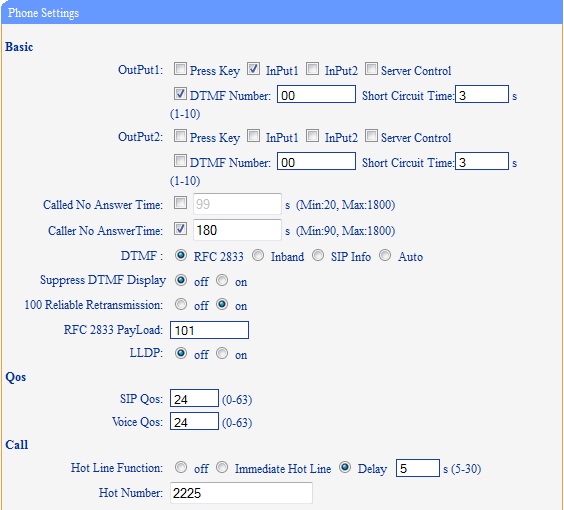
- Once the Extension is registered with the PBX, the you can setup the Hotdial. This can be a Group or Extension in the system, make sure the delay is set to 0. When the button on the doorbox is pressed, then this will be the group or the extension which is called. The code to dial to send the open command to the output contacts by default is 00. This is defined under DTMF.
The operation is defined as, User presses Center call button on Door box, Unit Hot dials the Extension or group defined under Hotdial, and the answering party dials 00 which activates the door open current.


