Difference between revisions of "Softphones"
Jump to navigation
Jump to search
(Created page with "= Counterpath Xlite Softphone and the IPitomy PBX = <div>Download</div> * Using your web browser, navigate to http://www.counterpath.com/x-lite.html and *download the Xl...") |
|||
| Line 1: | Line 1: | ||
= Counterpath Xlite Softphone and the IPitomy PBX = | = Counterpath Xlite Softphone and the IPitomy PBX = | ||
| − | |||
<div>Download</div> | <div>Download</div> | ||
| − | * Using your web browser, navigate to http://www.counterpath.com/x-lite.html and | + | * Using your web browser, navigate to [http://www.counterpath.com/x-lite.html http://www.counterpath.com/x-lite.html] and |
*download the Xlite phone | *download the Xlite phone | ||
* Install the Xlite Softphone on your PC | * Install the Xlite Softphone on your PC | ||
<div>Configuration</div> | <div>Configuration</div> | ||
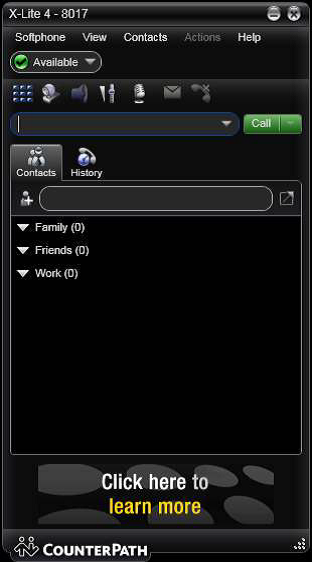
* Launch Xlite and you will see the following window | * Launch Xlite and you will see the following window | ||
| + | |||
| + | [[File:SoftphonePicture1.png|center]] | ||
| + | |||
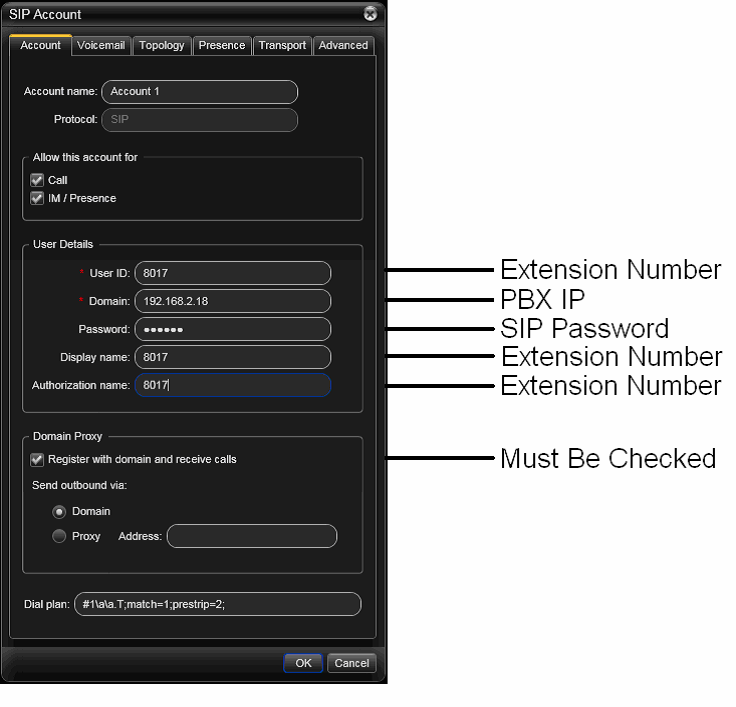
*<span style="font-size: 12px;">Click Softphone at the top of the phone and select Account Settings</span><span style="font-size: 12px;"> </span> | *<span style="font-size: 12px;">Click Softphone at the top of the phone and select Account Settings</span><span style="font-size: 12px;"> </span> | ||
*<span style="font-size: 12px;">Enter the Extension Number for: Display Name, User Name, and Authorization User </span><span style="font-size: 12px;">Name</span> | *<span style="font-size: 12px;">Enter the Extension Number for: Display Name, User Name, and Authorization User </span><span style="font-size: 12px;">Name</span> | ||
| − | * | + | *<span style="font-size: 12px;">Enter the SIP Password of the extension in the Password field</span> |
| − | * | + | *<span style="font-size: 12px;">Enter the appropriate IP address for the PBX under Domain</span> |
| − | * | + | *<span style="font-size: 12px;">Check the box for ‘Register with domain and receive incoming calls</span> |
| − | *<span style="font-size: 12px;"></span>< | + | [[File:softphonePicture2.png|center]] |
| + | *<span style="font-size: 12px;">Click OK and the phone will register to the PBX</span> | ||
| + | <div><br/></div><div>Congratulations, you have now configured your Xlite softphone to work with the IPitomy PBX.</div><div>You should now be able to see that the phone is registered in the PBX under Monitoring, and you</div><div>will now be able to make calls.</div><div>[Note] In order for DTMF to be correctly recognized, the ext for the Xlite needs to be set to</div><div>rfc2833. Since the free Xlite phone only offers one channel, you will not be able to use the Xfer</div><div>button on the phone itself. In order to transfer you will need to dial ##<extnum>#.</div><div><br/></div> | ||
| − | |||
= Bria Softphone Setup = | = Bria Softphone Setup = | ||
<div><br/></div> | <div><br/></div> | ||
Revision as of 19:59, 21 May 2013
Counterpath Xlite Softphone and the IPitomy PBX
Download
- Using your web browser, navigate to http://www.counterpath.com/x-lite.html and
- download the Xlite phone
- Install the Xlite Softphone on your PC
Configuration
- Launch Xlite and you will see the following window

- Click Softphone at the top of the phone and select Account Settings
- Enter the Extension Number for: Display Name, User Name, and Authorization User Name
- Enter the SIP Password of the extension in the Password field
- Enter the appropriate IP address for the PBX under Domain
- Check the box for ‘Register with domain and receive incoming calls

- Click OK and the phone will register to the PBX
Congratulations, you have now configured your Xlite softphone to work with the IPitomy PBX.
You should now be able to see that the phone is registered in the PBX under Monitoring, and you
will now be able to make calls.
[Note] In order for DTMF to be correctly recognized, the ext for the Xlite needs to be set to
rfc2833. Since the free Xlite phone only offers one channel, you will not be able to use the Xfer
button on the phone itself. In order to transfer you will need to dial ##<extnum>#.