Polycom
Just as any other SIP phone, you can manually configure Polycom phones to work with the IPitomy PBX. Polycom phones will use an Open Extension License, so be sure your PBX is licensed accordingly. Below are some guides created by ourselves and dealers who have gotten their phones to work.
Polycom IP7000 Set up for IPitomy
Admin password is 456 via the phone programming or web interface.
It is especially important to wait until the phone finishes restarting after each Save or submit!
In the following instructions, only enter information in the indicated fields. Leave the rest blank or whatever the default is.
- From phone keypad, navigate these menus:
Main Menu / Settings / Advanced / Admin Settings / Reset to Default Press: Reset Local Configuration
- Wait for the phone to completely finish restarting. And also wait for the phone’s web server to come back. This will take at least 2 minutes.
- Via the Phone’s web page make these changes: Type IP address of the IP 7000 in browser and log in under admin password.
Sip Server> Server 1 Address: Set to the PBX IP and Press Save
- Wait for the phone to completely finish restarting. And also wait for the phone’s web server to come back. This will take at least 2 minutes.
- Via the Phone’s web page make these changes:
LINES> Line 1 Display Name: extension number Address: extension number Auth User ID: extension number Auth Password: SIP Password Transport: UDP Only
- Server 1
Address: PBX IP Port: 5060 Register: 1
- PRESS SUBMIT
- Wait for the phone to completely finish restarting. And also wait for the phone’s web server to come back. This will take at least 2 minutes.
- For voicemail message indicator light service:
Message Center Subscriber: extension number@default [example:400@default ] Callback Mode: Registration
Polycom VVX500 Configuration
The following outlines how a dealer configured his VVX500 phones to work with the IPitomy PBX.
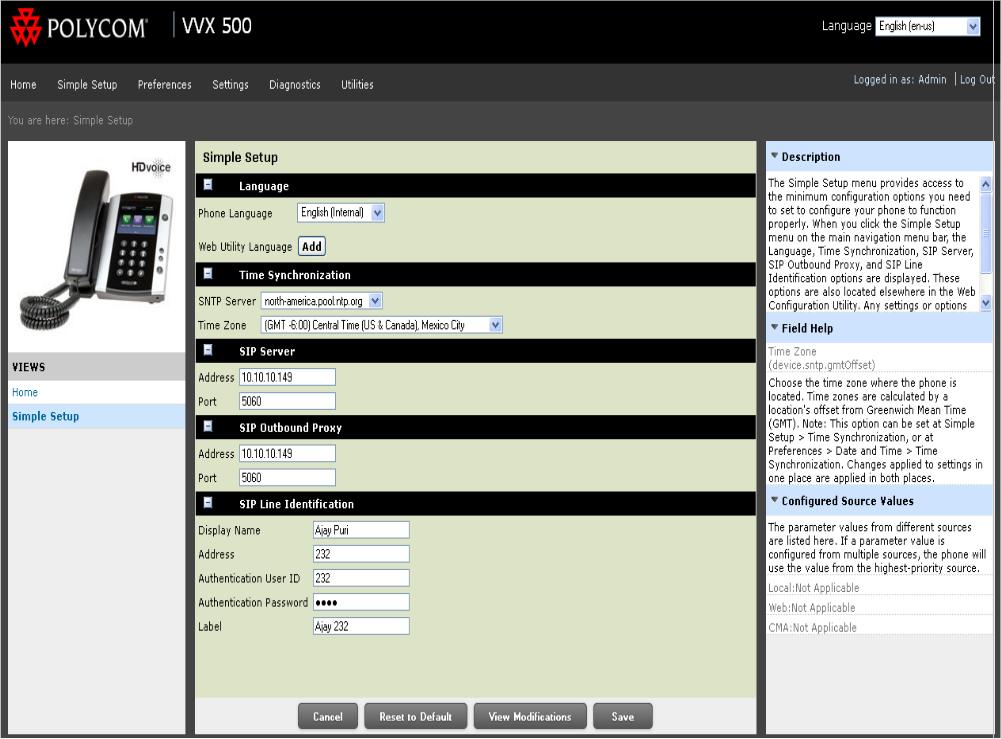
- Browse to ip address of Polycom.
- Select Simple setup.
- Populate the following fields with the appropriate information
- SNTP Server = north-america.pool.ntp.org
- SIP Server
- Address = <IP Address of the PBX>
- Port = 5060
- SIP Outbound Proxy
- Address = <IP Address of the PBX>
- Port = 5060
- SIP Line Identification
- Display Name = <Name of the Extension>
- Address = <Extension Number>
- Authentication User ID = <Extension Number>
- Authentication Password = <SIP Password>
- Label = Name of the Extension
Note: SIP server will either be the LAN IP for local phones or the WAN IP for remote phones.
Note: Authentication password is SIP password from Advanced screen of extension.
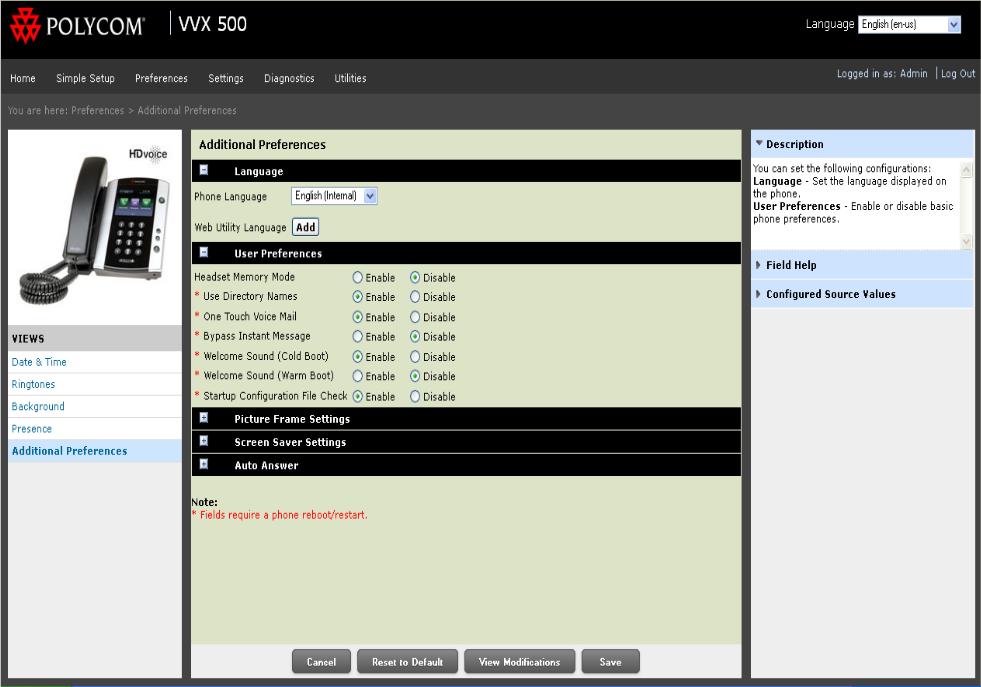
- Select Additional Preferences
- Under Preferences enable One Touch Voicemail
Note: This will restart the phone.
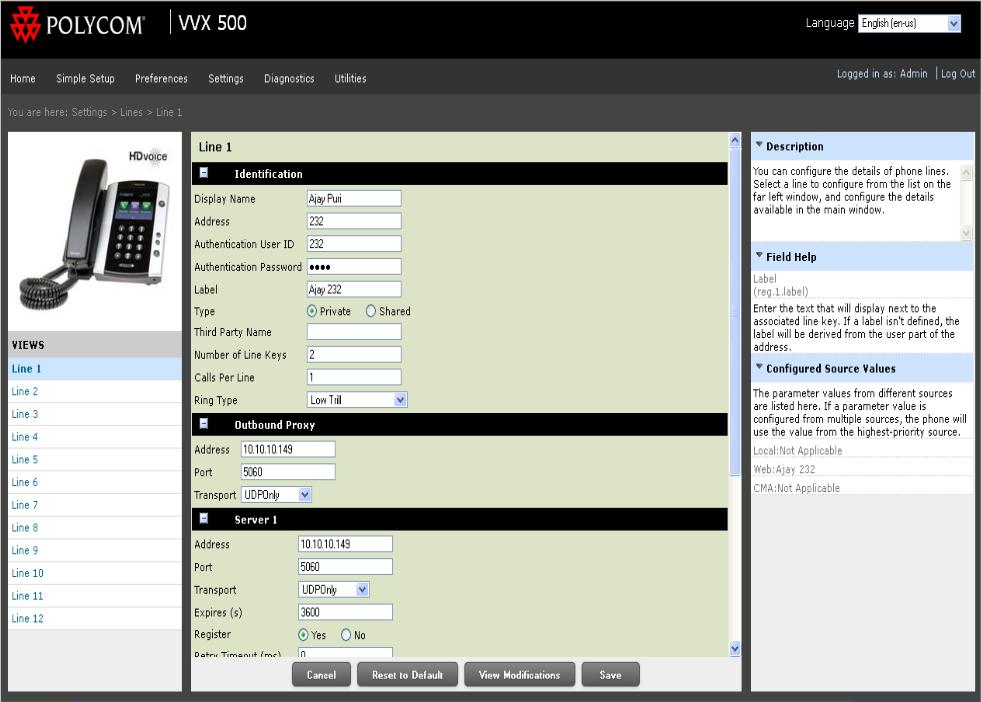
- Under Settings/Lines
- Change number of line keys from default 1 to 2
- Change Calls per line from 24 to 1
- This will place 2 line appearances on the Polycom VVX phone.
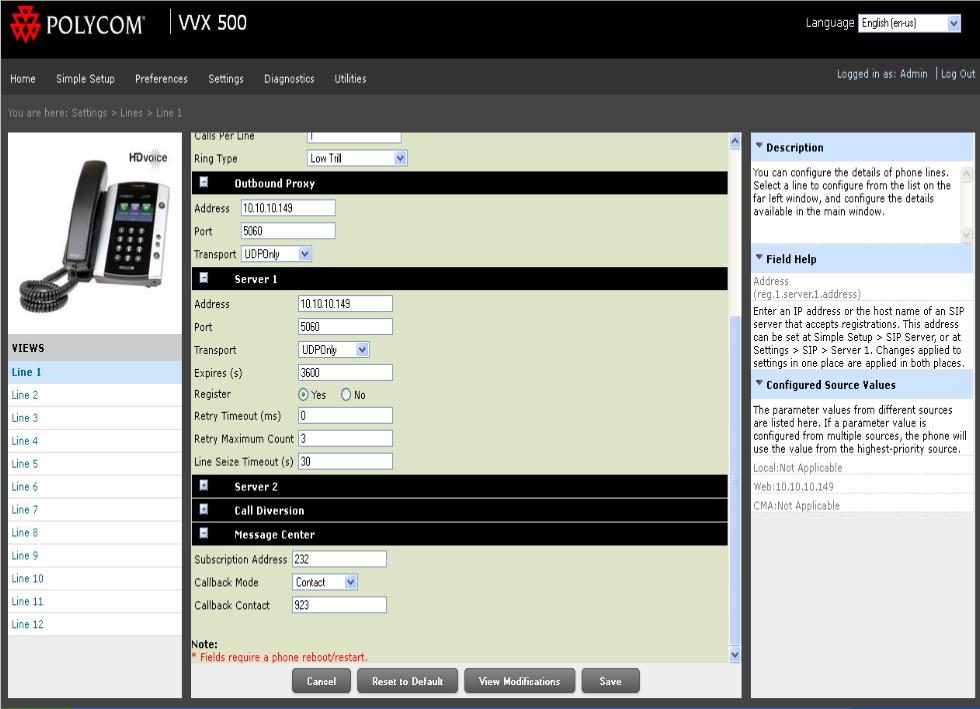
- Optional: Change SIP and Proxy server to UDPonly
- Under Settings/Lines/Message Center:
- Add user extension in Subscription Address
- Change Callback mode to Contact
- Callback Contact: 923
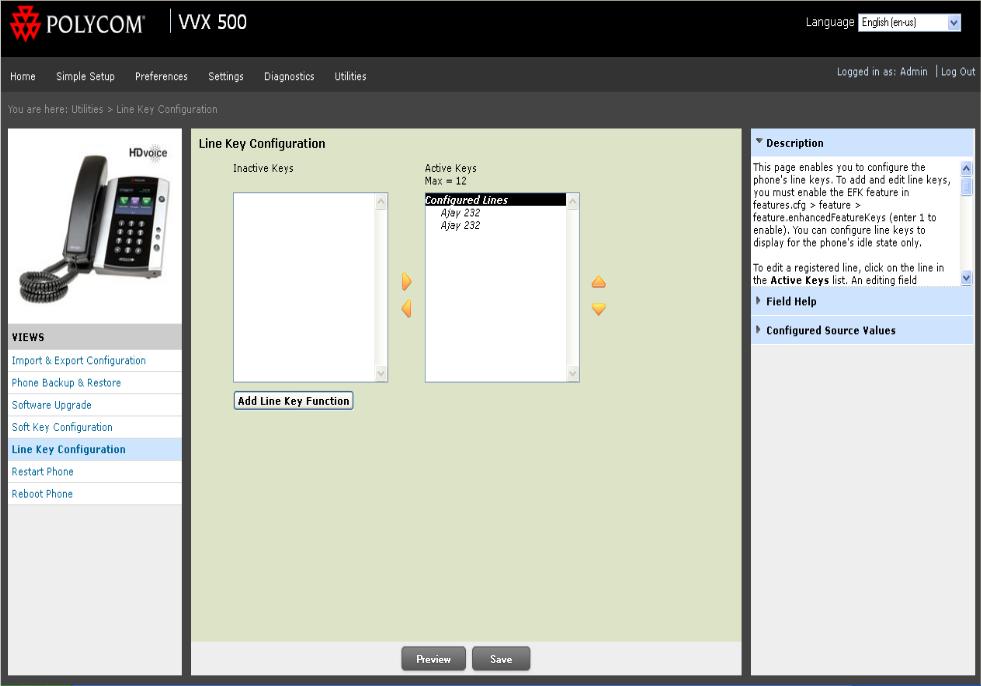
- Under Utilities: Line Key Configuration
- Program any speed dial, BLF, or additional keys for the phone.
Note: for a Park button on VVX-series phones, instead of making a speed dial for ##700#, Polycom has 2 settings, normal and automata. Set the park button to 700, and change the type to automata. This will do a blind transfer to 700, which is how park works.
Note: This will also restart the phone.
