Q Manager

Q Manager is a Windows application that allows users to monitor and interact with calls. Your PBX must be on version 4.6.1 in order to use Q Manager, and 4.8.0+ to use the integrated chat feature. Licenses are sold to allow extensions access to the Q Manager feature.
NOTE: Currently QManager can only retrieve calls parked via the standard Park feature, not Directed Park.
Right click, and select Save Link to download QManager [QManager Download]
NON-Windows PC Users / Web Manager
If you have a user that has MAC and/or not a Windows PC, Q Manager software will not run. To accommodate this, we have created something we call Web manager. To access, the user will still need to have a license assigned to their extension for Q Manager, but they will access a webpage instead of running a piece of software. The address for Web Manager would be <PBXipAddress>/ippbx/WebManager. The user will be prompted to login, the username will be their extension number, and the password will be their voicemail PIN. Web Manager does not have all of the advanced functionality of Q Manager, but you are able to left click on a call and do some actions.
NOTE: The URL is case sensitive.
- Pickup: Use this to grab a call that is ringing on an extension other than yours.
- Page: Use this to page another extension.
- Call: Use this to call another extension.
Idle extensions will show as Green, Ringing extensions will show as Light Green, and extensions on a call will show as Red.
Parked Calls will show on the right side of the screen, clicking a parked call will bring up an option to Pickup, which retrieves that call from park. (NOTE: Currently this will not work with Directed Park, only the standard park feature)
Installation
- Log into the PBX and assign Q Manager licenses to extensions. This is found under PBX Setup=>Services.
- User licenses have basic functionality, QManager licenses gain the ability to Barge and to Drag/Drop calls from Queue onto particular extensions. Agent and Operator are not used at this time and are there for future possible functionality.
- Save and Apply Changes.
- Click the Restart Call Manager button.
- Q Manager requires that your PC have .NET Framework 4.0 installed.
- Once .NET Framework 4.0 is installed, right click, and select save link to download QManager QManager
- NOTE: You may need to be using Internet Explorer to one click install.
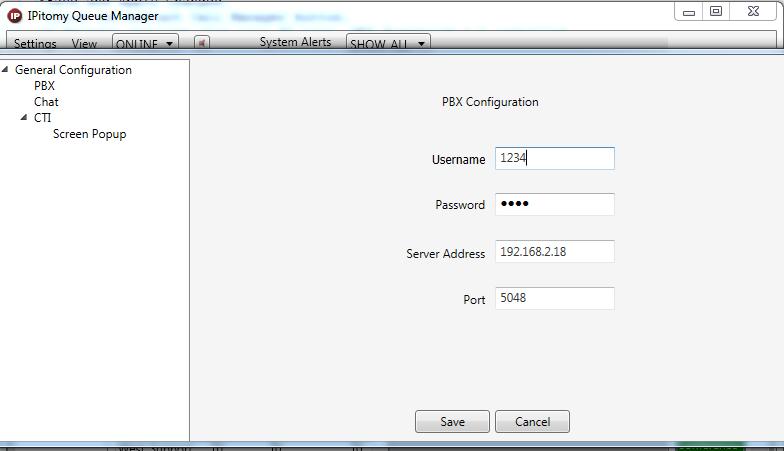
- Click Settings in Q Manager if the settings are not displaying on launch
- Set Username to an Extension Number that is assigned a license
- Set Password to the Voicemail PIN of the Extension
- Set Server Address to the IP of the PBX
- Leave Port at the default of 5048
- Save and so long as the PC is in an IP range included in the ACL for Call Manager, you will have a working copy of Q Manager.
- NOTE: If you would like to use Q Manager as a remote user, we advise that the remote PC come in over a VPN.
Training Video
The following [Video] goes over how to use Q Manager, with some basic setup instructions near the end.
Chat
The PBX has a built in XMPP Server that allows Q Manager to use Chat.
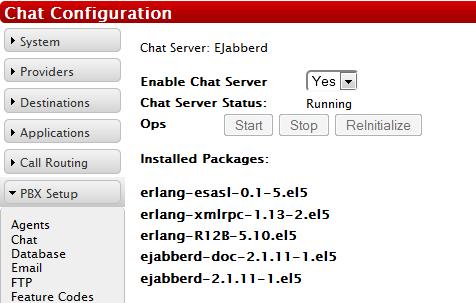
- Under PBX Setup=>Chat, make sure Enable Chat Server is set to Yes
- Ensure that Chat Server Status says Running
- Apply Changes
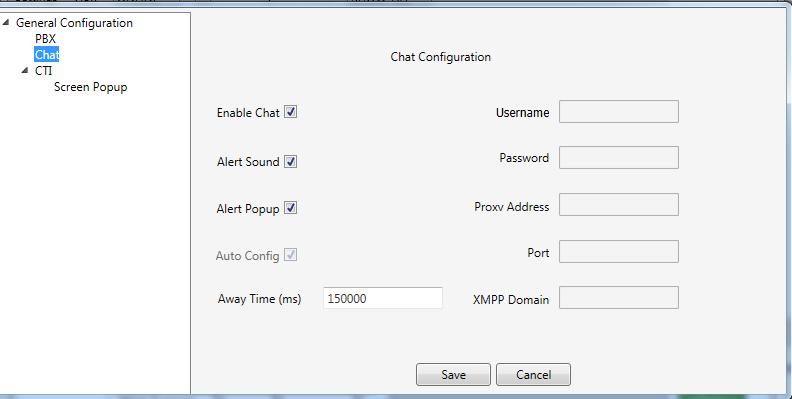
- Click Settings in Q Manager
- Click Chat and ensure its enabled
- Q Manager automatically uses the same settings for the extension
NOTE: Chat must be enabled for a user to see an Abandoned Call Notification for a ring group.


